Candle Making
Let’s start this off with saying, I LOVE CANDLES, I burn them whenever I can. There is just something about them that makes my home more cozy. My poor husband doesn’t understand why I like to burn them during the summer. It kind of drives him crazy….but he loves me 🙂 The one downside is candles are not cheap, well the ones I like are not. So I went on Pinterest (I know bad) and found that I could make my own. I thought I would share with you how easy and even relaxing it was to make them.
Choose Your Wax
The first decision you will need to make is what type of wax to use. I chose to use Soy Wax over normal candle wax (Paraffin) for the following reasons:
- it is natural, renewable, biodegradable and non-toxic (paraffin is made from crude oil, which is not renewable)
- produces less soot than paraffin wax
- pure soy wax can even be used to cook with or as massage oil (I’m not recommending either)
- cleans up easily (this made the choice for me)
Making Candles
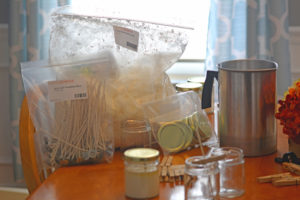
I am by no means an expert at making candles, this was my first experience. After I have more experience and have tried several different ways of making candles I will write another post if I find better methods/techniques or ingredients. For my first attempt here are the steps I took and the supplies I used.
 |
 |
 |
- Soy wax (or whatever wax you like)
- Wicks – There are different widths for wicks for the jar you are using i used 6′ pretabbed wicks because they were recommended for the size of jar I used
- Hot glue gun
- Clothes pins – Use these to hold the wicks, there are other ways I just had these on hand
- Jars – You can use any containers mason jars, old candle containers but i saw these and really liked them because I liked the look as gifts.
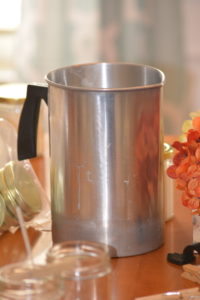
- Pouring pitcher – I bought one on amazon, this was the best thing I bought and I highly recommend it for candle making.
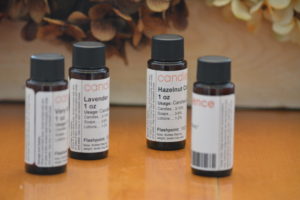
- Scents – It is up to you to choose your scents, I choose based on upcoming seasons and what I preferred.
- Labels – I am still working on these, but they are optional anyway. 🙂
 There is a specific temperature you’re supposed to get your wax, however I didn’t realize this until after I started. I think I will get a candy thermometer for the future. I believe the recommended temperature the wax needs to be heated to is 175 degrees fahrenheit. For the first batch of candles though I just waited until I felt like the wax was nice and fluid.
After the wax is melted add your scents. I have read for every one pound of wax you need 1oz of scent.
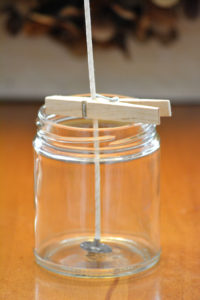
There are several ways to set your jars up. I found a way with clothes pins just because I had them on hand. I set them up before I started to melt the wax but you can do it while the wax is melting, whatever works for you. I hot glued the wick to the bottom of the jar so it would stay straight. Then pour, pour slowly to keep the jars clean and tidy, and so the wick doesn’t move very much.
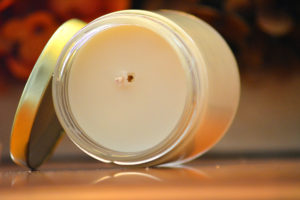 Be patient, let them sit for at least an hour. When I say be patient, I mean don’t touch them or try to cut the wicks like I did which made a hole in the wax.
I AM LOVING THEM!
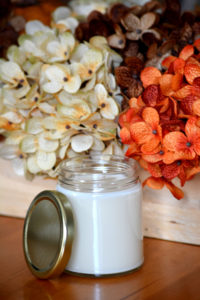 I have only made a few but I am so happy with the way these turned out and I am planning on ordering more supplies in the near future. I want to give these as gifts and just burn them everyday!!
I was so surprised how relaxing this process was for me. While the kids were in bed and hubby was playing his silly games 🙂 I put on some music and went to town. This is going to be something for me to do without kids, but that doesn’t mean I can’t let them be in a pic or two….. Too cute.
 silly games 🙂 I put on some music and went to town. This is going to be something for me to do without kids, but that doesn’t mean I can’t let them be in a pic or two….. Too cute.
I also got back on Pinterest and went crazy. I am planning on going to thrift stores for different types of jars! If you are a candle lover like me and love giving gifts, I highly recommend making your own candles.
I will keep you updated on what labels I end up using and any other tricks I find when making more in the future.